Playing video games, hosting sleepovers, entertaining the whole neighborhood, or providing entertainment for a church group are all excellent uses for a projector screen. Other uses include family bonding time, watching movies together, and entertaining overnight guests.
On the other hand, the installation cost can be out of your price range. Have you given any thought to creating your own? Your do-it-yourself projector screen frame might take as much or as little time and financial investment as you feel comfortable allocating.
You also have the option of choosing how portable it is going to be. In this article, I’ll guide you to some simple steps on how to build a projector screen frame.

How to Build a Projector Screen Frame
Each person wants the projector screen to be in a different place. Some individuals desire a long-term fix on a wall or fence. Others may prefer that the stand include legs so that it may be moved or disassembled quickly.
The screen frame itself will often be the same in either case. I advise deciding on your chosen screen proportions first. Once you have those measurements, building the frame will be simple.
Here are the materials that will be needed:
- DeepBlack Tape
- Screen projector materials
- Wood frame
- Staples
Build a wood frame
Determine the dimension
The size of the material you will need to order will depend on the visible dimensions, also called the screen size you want to achieve in the end. Once you know how wide your content can be seen, you can easily figure out how high it can be seen by adding up that size to the aspect ratio you like.
For example, if the viewing width you want is 105 inches, you should use a material that is 110 inches wide. This will let you stretch 5 inches of fabric over the wooden frames.
Calculate the dimension
To the necessary viewing size, add the width of any tape or trim made of black felt. For instance, add the 105″ viewing width by 2 and the 3/16″ overhang twice to get a total frame width of 109 3/8″ if you’re using 2″ black felt tape and trim.
Your frame dimensions will match your viewable dimensions if you’re striving for a zero-edge design and aren’t planning to finish with tape or trim. Cut two pine pieces that match the frame’s length exactly.
Last but not least, trim three boards to be 7′′ shorter than the actual frame height, with one piece going in the middle for support. Make the frame using your preferred joinery technique.
Stretch and staple the material
Make sure your work area is clean and free of dust before you unpack your projector screen materials. Start by putting the material for the projector screen face down. Then, put your frame face down on top of it.
Wrap the cloth around the frame. I’d say to start in the middle of one long side and keep the tension even as you fix a small section. Then, fix the other side, making sure there is enough tension to pull the fabric tight but not so much that it tears at the staples. As you move toward the corners, keep the tension even as you go. You may find that you need to move some staples as well.
Frame finishing (optional)
A border tape can be put directly on the screen material or on a border like an architrave that is on the outside of the screen. Spray on the black band trim on the back and let it dry. Nail the back band trim to the frame.
Put the black felt tape on top of the screen material with a pair of scissors or a utility knife. Be careful not to stretch the tape. Use the picture hangers you want to hang your pictures on.
Also read: How Much Does a Home Theater Cost

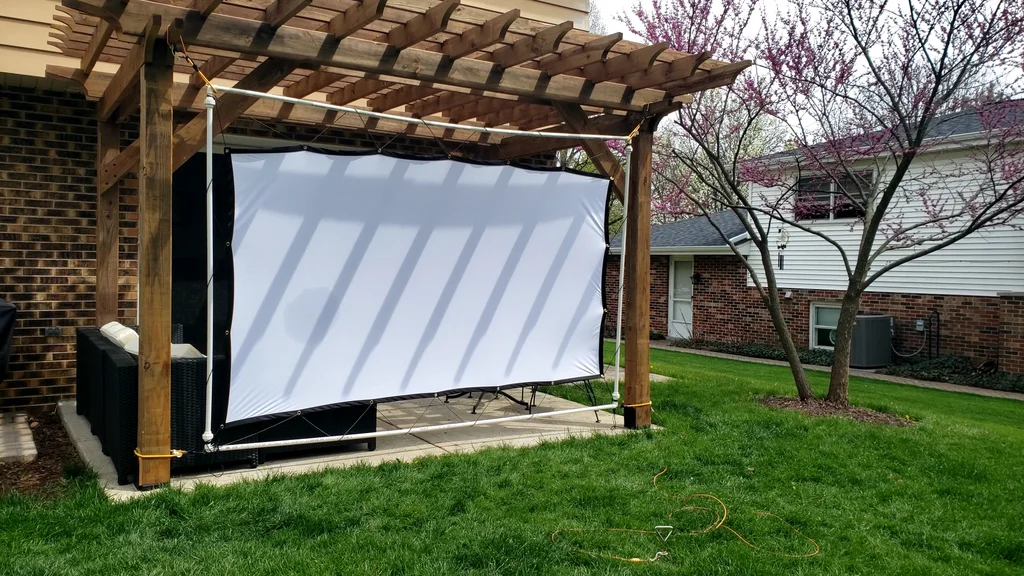
How to Build a Standing Projector Screen Frame
The first step is to observe your area and choose the location of the screen. Although not directly related to making a screen, this is a crucial phase since it enables you to determine the size and construction materials.
Moving around after setting up your projector screen might be difficult, especially if your projector is mounted and your seating is set up.
Here are the materials that will be needed:
- 4 10′ PVC pipes
- 3-4 T fittings
- 4 caps
Preparation
- Cut two of the 10′ PVC pipes into 8′ lengths, reserving the 2′ ends. These 8′ pieces will form the top and bottom of your screen stand.
- Two 4′10” lengths should be cut from one of the 10′ PVC pipes. There will be 4′ of leftover material that you don’t need. These two lengths of 4′10” each serve as the left and right sides of the screen stand.
- The last 10′ of PVC pipe should be chopped into four 2.5′ lengths. These are going to be the stand’s feet, with a length of 4′10” and one stand on each side.
Operation
I advise employing two people to install this projector screen stand the first time until you get the hang of it. An 8′ PVC section should have 90-degree angles at both ends. Using the joined angles, join the 8′ sections and the 4′10” PVC lengths.
To join the remaining 8′ lengths for the bottom of the screen, place one T fitting on the bottom of each of the 4′10” inch sections. Utilize the remaining 2′ lengths to descend off the screen after that.
Add another one T Fitting to the bottom of each of the 2′ long pieces. On each leg of the T Fitting, connect the four 2.5′ lengths on either side. On the exposed pipe ends, install the 4 end caps.
Since screens differ, align your screen grommets with the frame and indicate the locations of your hooks with a marker. Drill the holes and manually twist the hooks. This stand is simple to fold for storage and rebuilding because all parts are replaceable.
Related: How to Get Wrinkles Out of Projector Screen
Conclusion
A screen that is purchased may appear to be the alternative that is easiest and best. However, the expense does not necessarily guarantee that the screen is of higher quality. Screens you make yourself are an excellent choice for your home theater, and it’s surprisingly easy to put up your screens.
These are just a few examples of projector screen frames. The fact that everyone uses different techniques makes DIY projects so interesting. You can make the frame fit perfectly in your area according to your needs and requirements.
So, by reading this article on how to build a projector screen frame, you now know how to do it. Grab your stuff and get to work.